For the do-it-yourself duck and goose hunter building decoys from foam is a viable option to create a custom decoy spread. Two-part urethane foam will yield a very strong decoy. Molds made of aluminum are available from multiple vendors and work quite well. Besides allowing hunters to build their own decoys, foam decoys do have several advantages over plastic decoys. Like cork decoys, foam decoys are also unsinkable as they are solid foam. Foam decoys will also hold paint better than plastic decoys, but not as good as cork.
The two types of foam used for decoy building are EPS and two-part urethane. An EPS type foam decoy is derived when EPS beads are placed in a mold and then heated in boiling water. This foam is fairly durable and holds paint well. This type of foam is available in different colors. As the decoy paint will eventually wear or chip, black is a good color of choice.
A two-part urethane foam decoy is derived when the two liquid parts are mixed, poured into a mold, and allowed time to expand and harden. This foam is far superior to the EPS type foam. It is much harder, thus more durable. It also holds paint well. No external heat source is required when making decoys of this material. The chemical reaction that takes place when part A and B are mixed will generate a small amount of heat.
When deciding which foam material to use we highly recommend the two-part foam. Although this material is more expensive, urethane decoys will by far outlast EPS foam decoys. Another very important consideration is the safety hazard in using a large container of boiling water that is required to expand EPS beads.
Molds are available for both goose and duck decoys. In most cases the body and head are formed from two separate molds. Decoy molds are usually constructed of aluminum, with some fiberglass molds custom made. When purchasing a body mold an extracting mechanism should be considered. This mechanism is usually a large bolt that can be turned into the mold in order to push the finished product out of the mold. This feature can save you from allot of frustration and is highly recommended. Not all molds have this feature.
A release agent is used to keep the foam from sticking to the mold and will allow you to remove the finished product from the mold. When using a two-part foam car wax in paste form will just fine. When using EPS beads corn oil should be used. We do not recommend using aerosol release agents due to the associated safety hazards.
Large C clamps are used to keep the halves of the mold together. When making bodies we recommend 3" or 4" clamps. 2" clamps can be used for making heads. You will need 4 clamps for body molds, and 2 or 3 clamps for head molds.
Disposable containers such as large Dixie Cups, or plastic paint buckets work really well for measuring and mixing the two-part foam. Dixie cups are cheap enough to through away after 1 or 2 uses. When using the disposable plastic buckets just flex the sides of the bucket and the foam will peel away.
Paint sticks are readily available and work well for stirring and dispensing the two-part foam. Lathe boards are also very economical and available at most lumberyards.
Latex gloves should also be worn building decoys using two-part urethane foam.
We also recommend wearing safety goggles when handling the two-part foam.
We are not listing the proper personal protective equipment for making EPS foam decoys as we do not recommend building these types of decoys due to the safety hazards that exist.
Let's Get Started
Step 1) Remove all foreign material from cavity of mold.
Step 2) Apply release agent to the mold cavity. Be careful to apply release agent to the entire cavity. If using car wax allow several minutes for wax to dry. Do not skip any areas of the mold when apply release agent.
Optional: If you would like an internal keel a lead decoy strap weight can be placed in the bottom of the decoy mold before pouring the foam outlined in the next step.
Step 3) Measure equal portions of part A and part B using a postal scale available at Wal-Mart. Turn power on to scale and weight for 0.0 to appear. After placing container on scale press the "Tare" button. This will zero out the scale. Now pour Part A until desired weight is achieved. Then measure while pouring part B into the same container until double the weight has been achieved. After thoroughly mixing pour foam into one half of the mold. Immediately position the other half of the mold and use C clamps to secure. Most foams will start to expand in about 1.5 to 2.5 minutes so you need to work quickly.
Step 4) After 30 minutes the C clamps can be removed and the mold separated. A large standard (straight blade) screwdriver works well for separating the mold halves. After one half of the mold is separated, a mallet can be used to tap on the remaining mold half. This will help to loosen the foam body or head from the mold. The foam body or head can now be grasped in one hand and the mold in the hand and separated. If the two parts will not separate try taping the edge of the mold on your workbench with the foam body or head below the mold.
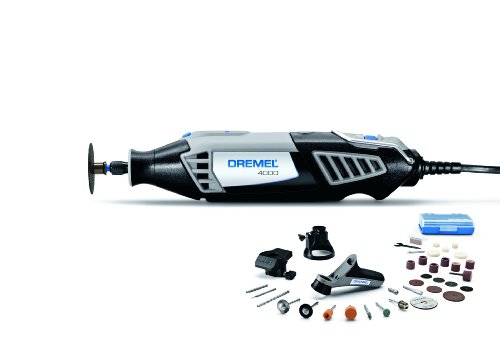
Step 5) Use 60 grit sandpaper to remove the edges created from foam expanding between the two halves of the mold. A Dremel tool can also be used for this step.
Step 6) If building foam bodies the keel can now be attached. We recommend using a man made decking material available from most lumberyards. This material is heavier than wood and will last a very long time without even painting or sealing it. We attach the keel using 2 deck screws that are 4" long. A waterproof construction adhesive can also be used to further strengthen this joint.
Step 7) Attach the head of the decoy with either a 1/4" screw eye, or a 4" long deck screw. A washer should also be used between the screw head/eye and decoy body. Use the screw eye for decoy cord attachment, or drill a hold in the front of the key to attach cord.